Saturday, 6 February 2010

Chocolate Macarons


Last week I went to Leicester for the weekend to visit my familly, so didn't have time to do any baking really. So this week I thought I could challenge myself, and make some macarons! I chose chocolate macarons, as I really wanted to buy some bournville cocoa powder, it makes the nicest hot chocolate and I haven't used it in ages. The cadbury's take over last week reminded me it existed. Now, the only macarons I have even seen are in cook books (and on mastechef!), so to be honest I was preparing myself for an almighty failure. But I was presently suprised! They had a nice crispy shell, chewy interior, and were very light. But there is definitely room for some improvement. I didn't manage to produce the puffy foot at the base of the macaron. I would have preferred them to have been shinier too. I don't think I will use a chocolate ganache filling again, as it was just too hard to spread on to the macarons, and ended up pushing my finger through a few of them, whoops! The recipe I followed was from Nigellas domestic godess cook book.


Ingredients

for the macarons
250g icing sugar
125g ground almonds
25g cocoa powder (I used bournville, because it's awesome)
4 Large egg whites
25g Caster sugar
for ze ganache filling
90ml double cream
150g plain chocolate (I used green and blacks, again, because it's awesome
45g unsalted butter (I used president french butter, because it was only a £1, and because it's awesome, its the first time I've tried it, and I don't think I'll be going back to tescos own brand)

Pre-heat the oven to 180 degrees.

Sift the icing sugar, ground almonds and cocoa powder into a bowl, and put to one side until needed. Whisk the egg whites in a super clean bowl until they form soft peaks. Sprinkle the caster sugar on to the whites, and continue whisking until the form stiff peaks. (stiff, but not dry, they should be nice and shiny). At this point fold in the dry ingredients with a large metal spoon, do this gradually with a cutting motion.

Carefully spoon the mixure into a piping bag, and pipe on to a baking tray lined with grease proof paper. The rounds should be approximately 5cm, and leave space for any spreading. Leave them for about half an hour to form a skin on the macarons, this will guarantee a nice crunchy top, and a chewy centre. Bake for 12 minutes.

Before they went in the oven

Meanwhile, make the ganache by melting the ingredients in a pan, on a very low heat. This should produce a very shiny runny mixture, leave in the fridge until it becomes spreadable.

Once the macarons are cooled, spread with the ganache and sandwich together (think posh custard cream/ bourbon biscuit)
Ta-da!


Scrumpadoocious!

Sunday, 24 January 2010

Coffee and Walnut Slice

Christmas, officially over, and then some

I heard on the radio today, this is officially the most depressing day of the year. Jarvis Cocker said it, so I believe him. It's something to do with how far Christmas is away, how much debt we're in, how many new years resolutions we've all broken, and the rubbish weather. I also saw this christmas tree a few days ago, just dumped outside my flat, waiting for the binmen, and it made me sad.

I got the idea for this recipe from a programme I watched on the BBC called "Delia; through the decades" it was awesome, and totally cheered me up. I am always quoting Delia Smith in the kitchen. If my boyfriend asks me a question, its normally answered by, "well delia says..." WWDD is my mantra, what would delia do? Which is totally corny, but I don't care.


Ingredients

for the sponge cake...
1 tbsp coffee 2 tbsps boiling water
75g toasted and finely chopped walnuts
175g Self raising wholemeal flour
175g softened butter
175g light brown sugar
1.5 tsps baking powder
3 Large Eggs

for the Syrup...

1tbsp coffee
60ml boiling water
50g demerara sugar

for the filling/topping...

1 tbsp coffee
1 tbsp caster sugar
25og Mascarpone
200g soft cheese
a few handfuls of chopped walnut

Preheat the oven to 170 degrees. Make the sponge by creaming the butter and sugar together until pale and fluffy. Add the eggs one at a time, and keep mixing. I use an electric hand whisk, but a wooden spoon is just as good , you just need some elbow grease! Sift the flour and baking powder into the mixture and combine. Fold in the hot coffee and finely chopped walnuts. At this point I used a loaf tin to put the mixture in, (I just bought a new one, so I wanted to take it for a whirl) but you can use 2 cake tins instead. Bake for 30mins for the cake tins, and about 35-40mins for the loaf tin.

While the cake is baking make the syrup and the filling. Dissolve the coffee in hot water with the sugar, and stir vigorously until dissolved. For the filling put all the ingredients in a bowl (apart from the walnuts) and beat with a wooden spoon or electric whisk. Put this in the fridge until needed.

When the cake is baked, take out the oven and prick all over with a skewer. Feed the cake with the syrup (like you would with a christmas cake) I found this made a real difference to the moistness of the cake. I was a little worried it would make it over poweringly-coffee-like, but it was perfect. Leave to cool in the tin completely. When I turned it out, I cut the loaf in half length ways, and filled it with a layer of the filling. After sandwiching together, I finished with the topping and a handful of chopped walnuts.


First slice, was beautiful

Sunday, 17 January 2010

Banana and Cinnamon Muffins

I'm so pleased the snow has gone! It was awesome at first. I had 2 and a half snow days off from work, staying inside drinking hot chocolate. After a while though, you do get kind of bored, and the road outside our flat was perilious. This weekend I'm making banana and cinnamon muffins! I needed something to bake that the boyfriend can put in his lunch box for work. (Well that was the request any way!)

Dinosaur cake cases


I've adapted the recipe from The Hummingbird Bakery cookbook that I received for Christmas (thanks mum and dad).

Ingredients

350g plain wholewheat flour
3/4 tsp salt

1 1/2 tsps baking powder
1 1/2 tsps bicarbonate of soda

2 tsps ground cinnamon
1 tsp grat
ed nutmeg
160g caster sugar
375ml buttermilk
1 egg
70g unsalted butter, melted
400g mashed bananas

pre heat the oven to 170 degrees. Put the flour, salt, baking powder, bicarbonate of soda, cinnamon and nutmeg in a large bowl, mix. Measure out the buttermilk into a jug, and add the egg, then whisk to combine. Slowly pour this into the dry ingredients, mixing as you go. You could use an electric whisk on slow, but you don't want to over beat the mixture. A wooden spoon is just fine! Pour in the melted butter and mix til combined. Followed by the mashed up bananas. Mashing the bananas was incredibly satisfying by the way!

Spoon the mixture into muffin cases, and sprinkle with some demerara sugar and cinnamon. bake in the oven for about 25 minutes.

The sugar on top, gave it a nice crunch


This one was "chefs treat"

These did work really well, and were moist and banana-ry. Hopefully they'll go down well in the lunch box tomorrow.

Saturday, 9 January 2010

Dark Chocolate and Cream Cheese Brownies

First week back at work after Christmas, so I thought I'd bake something incredibly chocolately and gooey. Brownies! Earlier this week Manchester had about 48 hours of heavy snow, and temperatures of -10, so I think some serious chocolate action is deserved.

Walking to work, in the snow


More Siberia than Salford


I've had a go at baking brownies a few times and have never mastered the gooey-centre, just a slab of chocolate cake. (don't get me wrong a giant slab of chocolate cake is still nice!) This time I added another egg to my usual brownie recipe. success! they worked really well.

Dark Chocolate and Cream Cheese Brownies

Ingredients

125g Dark chocolate
125g unsalted butter
2 Large eggs
200g caster sugar
75g plain flour
200g cold cream cheese (full fat, you might as well)

Pre heat the oven to 180 degrees and line and grease a brownie tin

Melt the chocolate and butter in a large bowl over a pan of boiling water. While this is melting beat the eggs and sugar in a seperate bowl. Once the chocolate has melted take it off the heat and let it cool slightly.

mmm, shiny chocolate

Once you've given the molten chocolate a chance to cool down, pour the eggy-sugar mixture into the bowl and beat until combined, followed by the flour. Pour about half into the brownie tin and smooth down with a spatula. At this point you need to create a cream cheese centre to the brownie. Make sure its really cold first, blast it in the freezer for 5 minuttes, then you can slice it and layer it on the brownie mixture. Finish by pouring the rest of the chocolate brownie mixture to cover the cream cheese.


I wanted to eat these straight away!


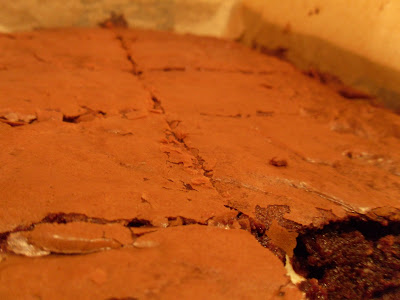
Bake for 20 minutes. By this time it should have a dry cracked surface, but when pressed with your finger have some give. Cut into squares, and lift out once cooled. Makes 8-10.


sweet gooey chocolate centre, with salty cream cheese, great combo

Success! They worked really well. I wouldn't mind a few of these with a coffee if I was snowed in!

Wednesday, 30 December 2009

Scones


There is definitely something to be said for homemade scones. Tall, fluffy, light, absolutely delicious with some jam and cream (is there any other way?!) I find their shop bought relatives are so much more cakey and bland. All the same shape and height, who wants that? boring!

Scones really are so easy to make. For a sure fire success I have just 2 "rules"

1. Handle the dough as little as possible.
2. Use cream of tartar (I really have no idea why it makes them so light,, must be some magical chemistry going on somewhere)

Ingredients


500g Plain flour
1 tsp salt
4 1/2 tsp cream of tartar
75g cold diced butter
300ml milk (you could use buttermilk if desired)

  • weigh out all the dry ingredients into a bowl, and rub in the butter. It shouldn't really look like breadcrumbs, more like damp flour. Make a well in the centre and pour in the milk in one go and stir until combined.
  • Turn this out on to a floured surface, and knead very lightly to form a soft light dough. This really should take about 15 seconds.
  • Roll out to about 3 cms and then cut out with a pastry/ biscuit cutter. I use a 6 1/2 cm crinkly edged cutter. Place on to a floured baking sheet, and pop in a pre-heated oven 220 degrees for about 10-12 minutes.

You can either glaze with egg whites or dust with flour before they go in the oven. This recipes makes between 9-12 depending on how thick you go with the dough.


Variations: You can literally go mental! throw in a handful of raisans, cherries, grated cheese. I like to add a few drops of vanilla, and serve with cream, jam, and a sprinkling of icing sugar.

delicious!

Tuesday, 29 December 2009

Peanut and chocolate squares


Christmas is over! So I should be concocting something wholesome and nutritous? Instead I've whipped up some no-bake peanut and chocolate squares. I just couldn't resist. I received loads of foodie gifts this year, and I stumbled across this recipe. My best foodie present was an egg cupboard from the mother-in-law. Truly inspired gift choice. It came with 2 egg cups, and little holes to keep your eggs. It looks so pretty on my work top.


Ingredients

for the peanuty base...
50g unsalted butter
200g smooth peanut butter
300g icing sugar
50g soft brown sugar

for the chocolately topping...

100g good dark chocolate
200g milk chocolate
1 tbsp unsalted butter

You can totally play around with the chocolate ratio, but I wouldn't go 100% milk, just reading the recipe is eye-wateringly sweet! The saltyness of the peanuts really makes it work.
  • Beat all the ingredients for the base in a bowl. I always use a wooden spoon, but a electric mixer would be absolutely fine. Once smooth, press down into a lined brownie tin. Try and make sure this layer is as smooth as possible
  • Next, melt the chocolate and tablespoon of butter. Double boiler, zap it in the microwave, whatever, as long as its melted! Personally I would put it in the microwave on medium for about 90 seconds.
  • Pour the molten chocolate over the peanut layer. The butter in the chocolate should make it look shiny and glossy.
  • Pop it in the fridge to set. It should take a few hours. Cut into very small squares once it has set.
Ta-da! These are incredibly more-ish, but jaw achingly rich. Hence the small squares. perfect with a cuppa.